

Updated March 30th, 2020
It’s easy to start an online store.
Creating products, marketing, and getting traction is the hard part.
Let’s start with setting up your store / home base. It’s a breeze thanks to the Shopify eCommerce platform.
What is Shopify?
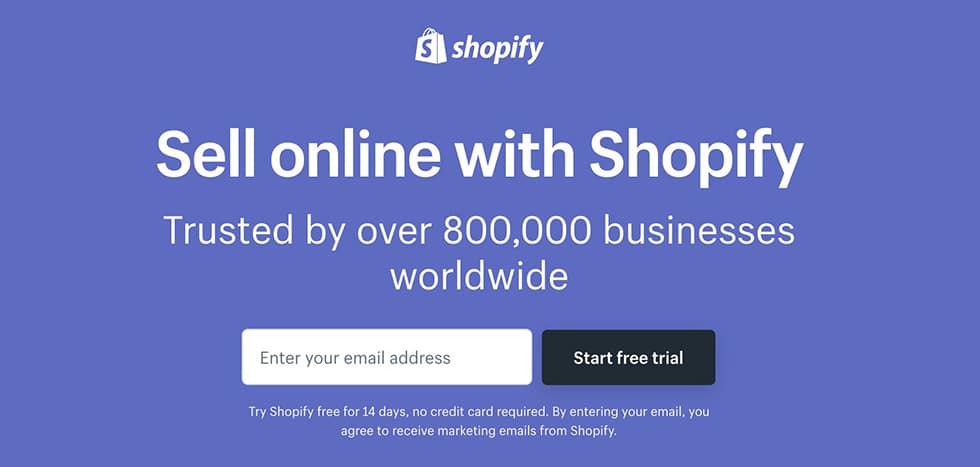
Shopify is a full service eCommerce platform. It’s a professional solution to selling products online.
![]()
It starts at $29/mo and includes:
- Online store platform
- Web hosting
- Payment gateway and free SSL certificate
- Lots of apps
- Lots of themes (website designs ready to go)
- Thriving community and forums
- Free support
Shopify is a great solution for:
- Selling products online
- Creating a home base if you’re selling on Amazon, eBay, Etsy, etc
- Dropshipping
- Building a brand
You get a 14 day free trial. As a Shopify Partner and official Shopify Expert, I get a commission if you sign up through my referral link. I’m happy to include help or advice with that… I’ve built / grown a lot on Shopify.
Why Shopify?
I’ve been a professional web developer since 2011, and mostly eCommerce focused since 2013.
I’ve worked on a lot of other eCommerce platforms – Open Cart, Zen Cart, Magento, Volusion, PrestaShop, WordPress (WooCommerce), and Squarespace.
I discovered Shopify in 2012 and liked working with it so much I shifted my focus to Shopify development in 2013. Since then it’s the only eCommerce platform I’ll build on or recommend.
I’ve built a lot of sites on Shopify. And it gets better every year. I’m hooked!
Here’s what I like about Shopify:
- Huge and helpful community (here are the forums)
- Excellent control over website customization
- Don’t have to worry about server configuration, security, or payment processing
- Dirt cheap pricing for what you get
- Lots of awesome apps, and new ones coming all the time
- Fun to work on as a developer
- They’re a good company (in the sense they have a culture of being nice, helpful, and supportive to their merchants and partners)
- Over 800,000 stores and grows every year, you can bet the support and features are strong
It’s a good balance between being both web developer friendly and non-developer friendly.
You don’t need to know how to code to build and customize a site.
If you do like coding, you have that option too – you’ll find you can create / edit freely (some other platforms are “too non-developer friendly” and frustrating to work on if you prefer working in code).
Ok enough about the platform, it’s the best solution so let’s get on with setting up a store!
💡 How to use this guide
You can install a Shopify site in a few minutes… and you can spend a day or weeks with the design and customizations. Here are a couple ideas to get started:
Option A) Reserve 1-2 hours to walk through this guide and get a feel for the basics. Once you get the foundation up and running, you can start making tweaks, adding products, etc whenever you want.
Option B) Free up a weekend, dive deep into Shopify, and by the end of your weekend project you can have a fully functioning online store that looks good and is ready to sell your products.
My goal is to give enough info and guidance to set up your store and start customizing without bogging you down with too many details.
If you want more details or have questions, drop a comment at the bottom of this page.
If you need help or decide you don’t want to set up your own store, contact our team of Shopify experts here.
Set up Shopify (5 minutes)
1) Install Shopify – Go to the free trial Shopify setup page.
You get a free 2 week trial:
2) Enter your email, store name, and password to create an account.
If you’re desired store name is taken, try adding “Store” or something to the end. At this point you’re just identifying your backend Shopify URL.
You can change your website facing name / domain ( www.yourstore.com ) anytime.
3) Follow the prompts to finish setting up. This will take you to the admin section of your new store.
Welcome!
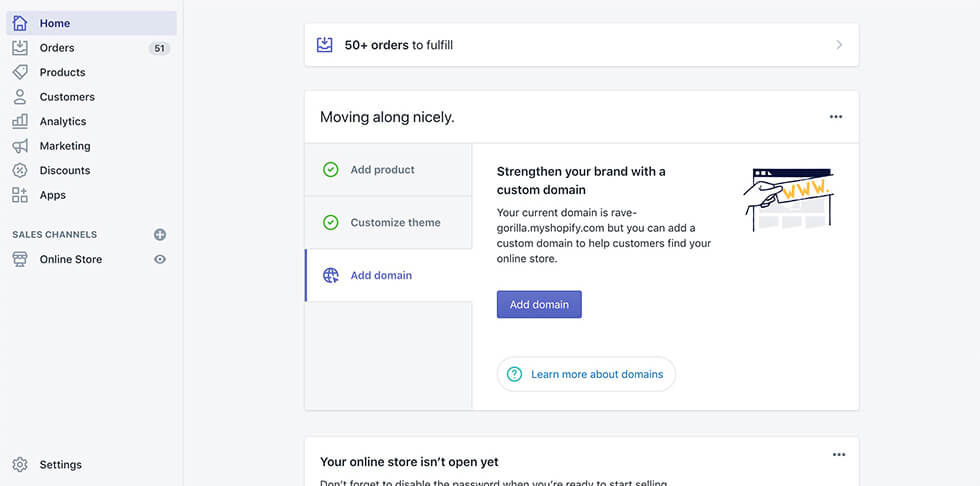
(You won’t have 50+ orders to fulfill, this is just my goof site where I run experiments and test apps).
Add a product (5 minutes)
If you don’t have any actual products yet it’s all good just enter anything you want here. You can add, edit, and delete products easily later on.
1) Click on Products in the sidebar, then click the Add Product button.
It will look like this:
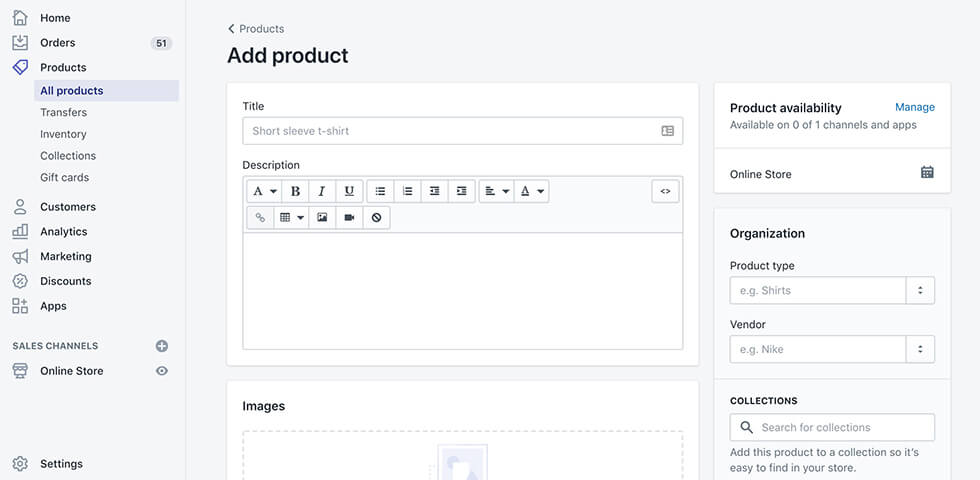
2) Enter a product title and description. Just keep it simple, you can fine tune later.
3) Upload an image and set a price. Now you have the basics and can sell this product.
4) Fill in the rest of the product information:
- Type: Used to categorize your products. Example: Shirts, Hats, Bracelets.
- Vendor: If you’re a brand, this is your brand name. If you’re dropshipping, it will be the product’s brand.
- Collections: Collections are a way to group your products into categories. Don’t worry about this for now.
- Tags: Tags are way to organize your products. You can create collections based on certain product tags. Enter a tag here, something that describes your product, like “Accessories” or “Tops” or “Bottoms” or “Bamboo”, etc.
- Inventory: SKU and Barcode are optional. For Inventory policy you can turn this on to track inventory so they’re marked “sold out” when you run out of stock.
- Shipping: Shipping rates can be calculated by price or weight of product. You can leave this blank for now.
- Variants: You can add variants if your product has variations like size or color.
- SEO / Search engine listing preview: This shows what your product page will look like in search engines. Shopify automatically pulls the product title you entered above into your “page title” field, which helps your page rank in search engine for the keywords in your title. The SEO description (aka “meta description”) is what shows up in search engine listings. You can change these later, for now just let it auto fill.
5) Click the Save button, then click View at the top of the page. This is your product page, people will be able to purchase from this page once your store goes live. Nice.
Customize the design
The website people see on a Shopify site is controlled by the Theme.
Go to your website to see your theme, for example: your-store.myshopify.com (you’ll add the friendly URL later).
To edit your theme, click on Online Store in your Shopify admin. You’ll see this:
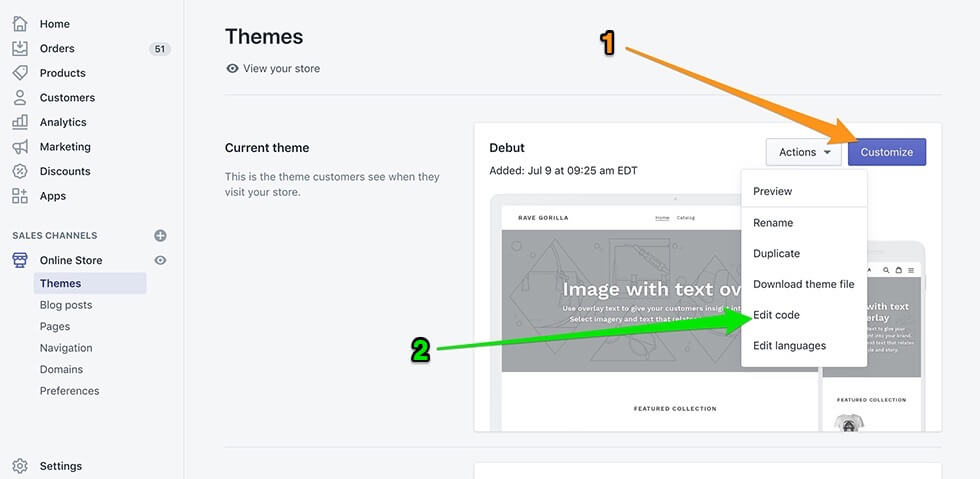
1) Click on Customize and browse your theme settings. This section is the non-codey customization area where you can change sections, colors, features, etc.
You can cruise around in the customize theme settings if you’d like, or just keep it movin’ and come back later to edit.
2) Click on Actions > Edit code to see how the files are put together to form your theme. If you’re comfortable with HTML and CSS, this is where you can edit theme code directly and create custom features / layouts.
If you’re not into programming, you can ignore that area.
3) Browse more themes. The default theme is ok for goofing around, but I’d recommend browsing the Shopify theme store. There are free and paid themes available.
Free theme vs Pro theme
I use a pro theme for probably 90% of Shopify projects. You usually get more options, better structure and design, more features, and theme support.
Most sites I’ve worked on keep their same theme for a year or longer, so consider a pro theme a long term investment – they’re usually about $100 – $350 for pretty much a full website ready to go.
It’s easy to switch themes any time, so go ahead and start with a free one if you want.
Other places I look for themes:
- Theme dev agencies like Out of the Sandbox – I’ve built sites with 3 completely different themes from them, they’re usually my go-to for starting a new project.
- Theme Forest is one of my go-to sites for themes in general. I’ll usually start with Out of the Sandbox or the Shopify Theme store, but I also like looking here because of the depth of selection.
Two of my favorite themes are Turbo (pro theme) and Brooklyn (free).
I recommend browsing some theme demos to find one that “feels good” for your brand / idea.
You can customize anything in a theme, so essentially what you’re looking for is a close match to save you time / money in customization.
4) Fill the theme out. Right now you’re site probably looks like an empty scaffold. Let’s add some images.
If you need some images check pexels.com (free) or istockphoto.com (paid). These are my 2 favorite stock image sites.
Start with grabbing a free image from pexels.com.
Find a banner image you like and download it, then go to your Customize theme section back in the Shopify admin and find the homage page banner section and upload that image.
In this default theme (Debut), you customize the hero banner in this section:
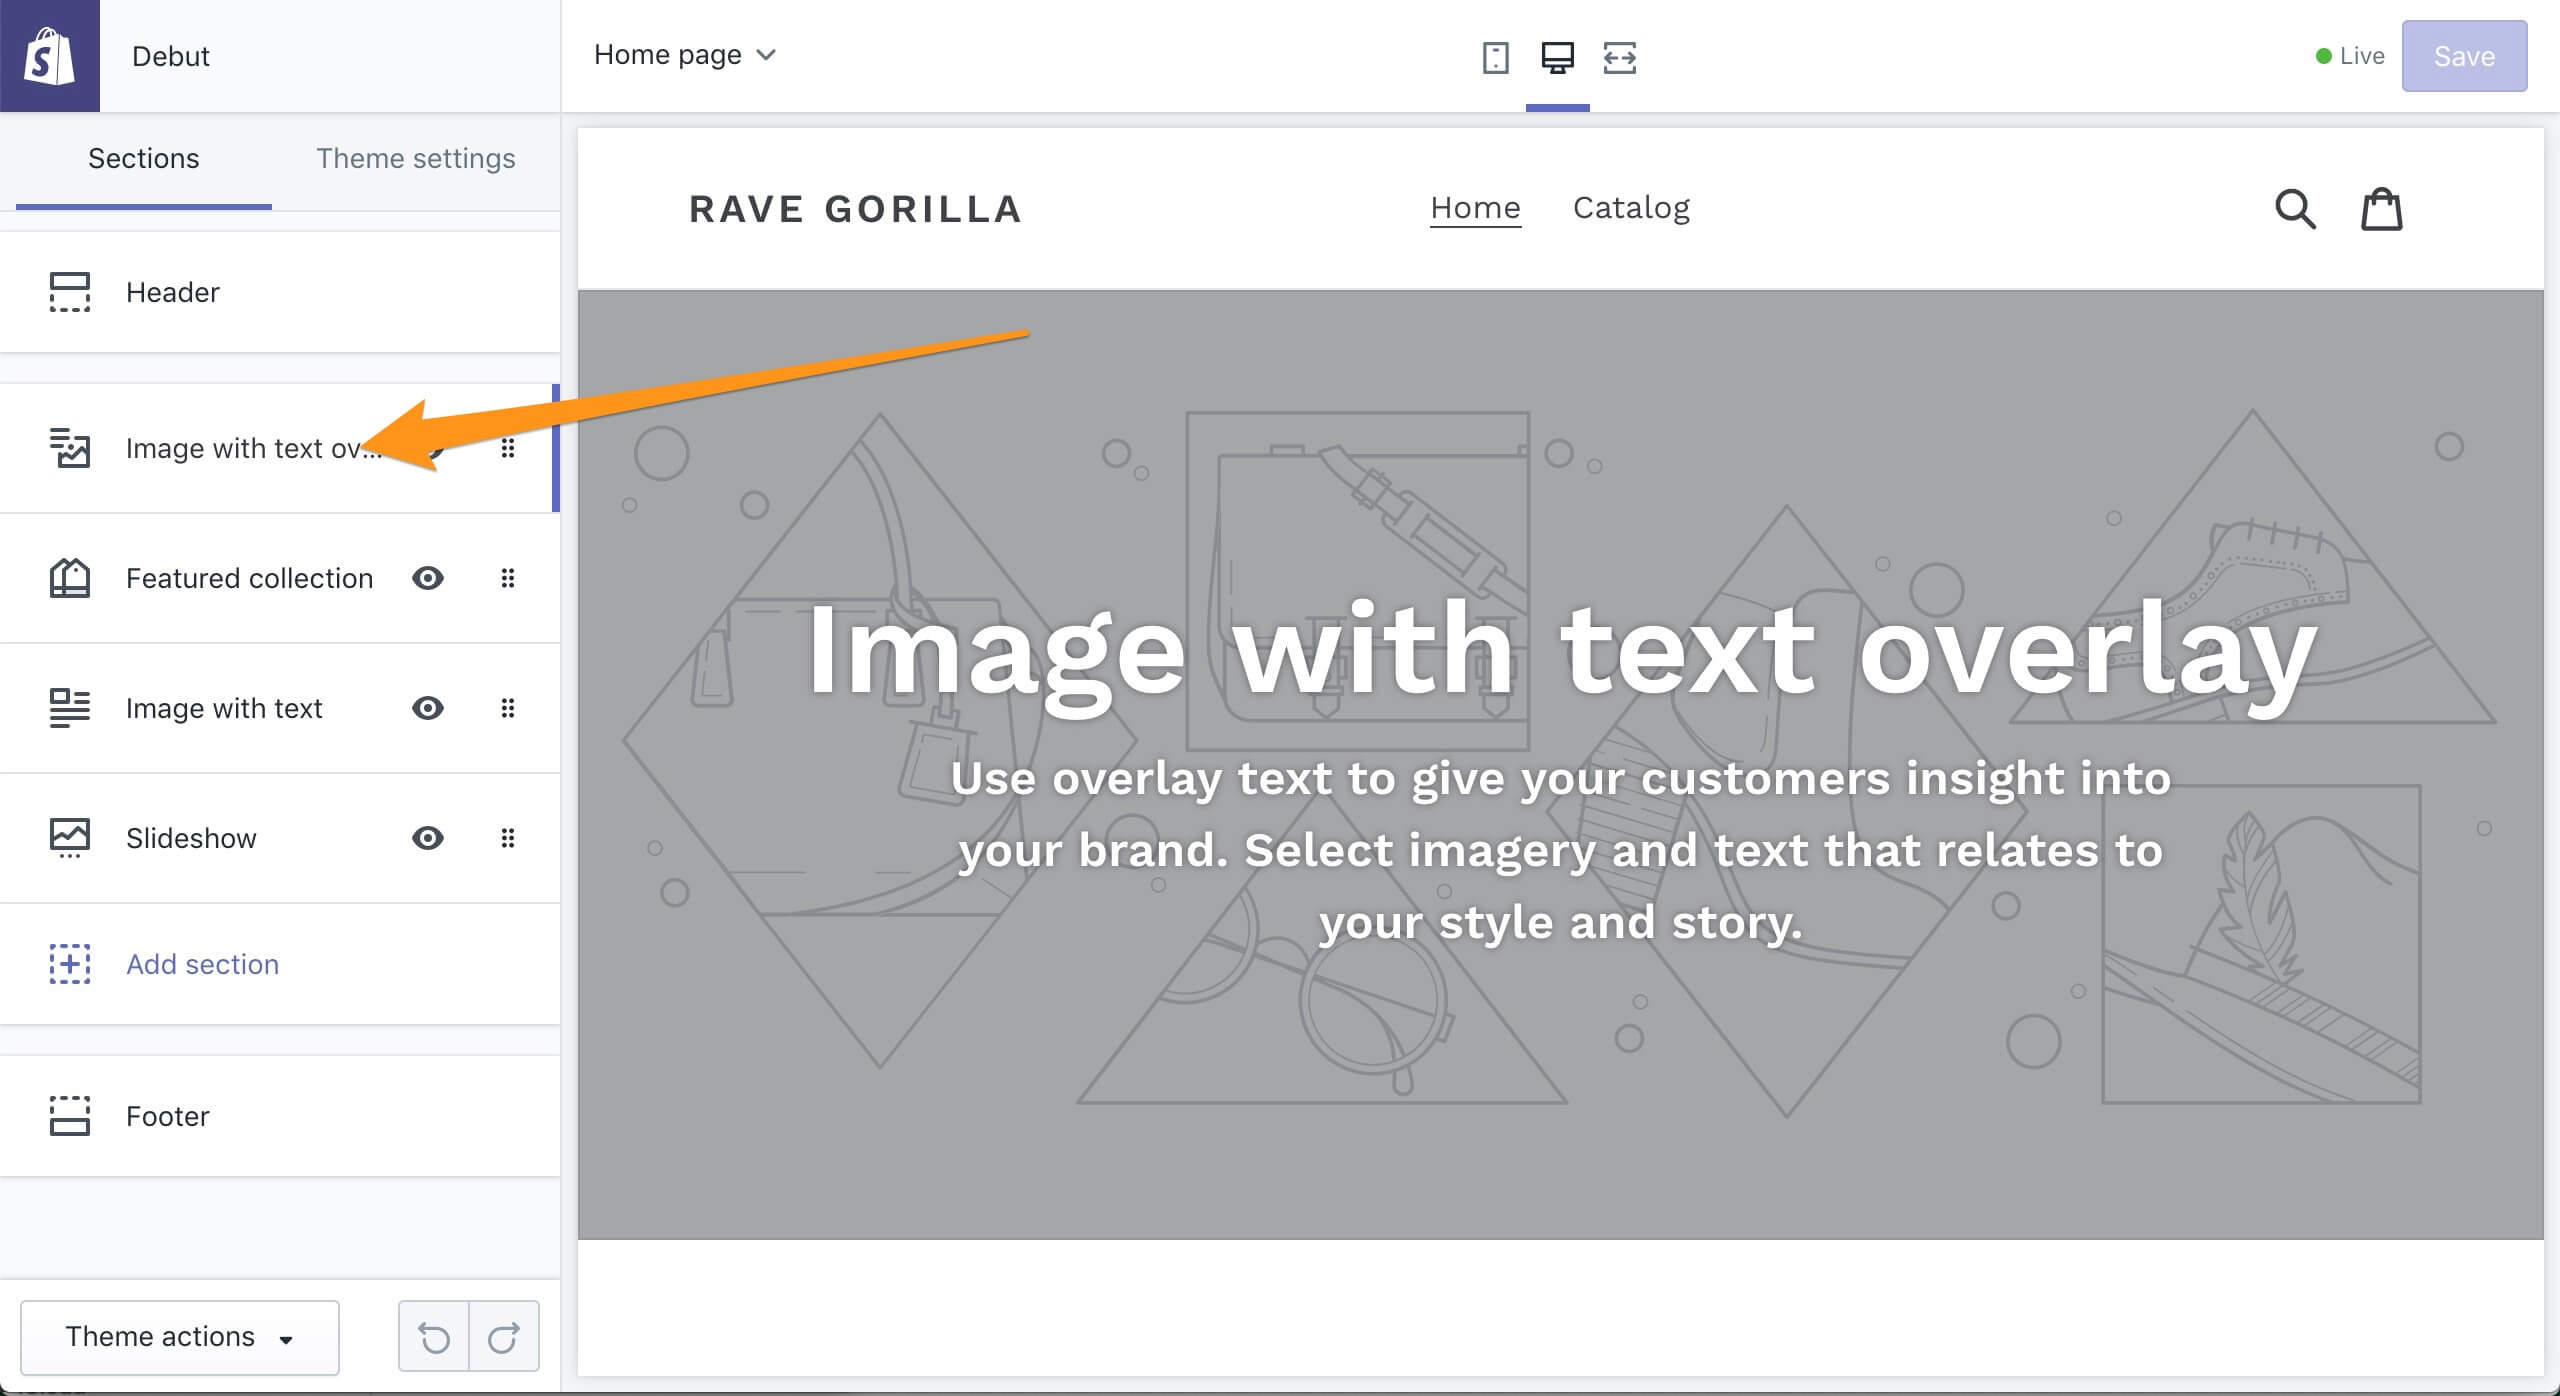
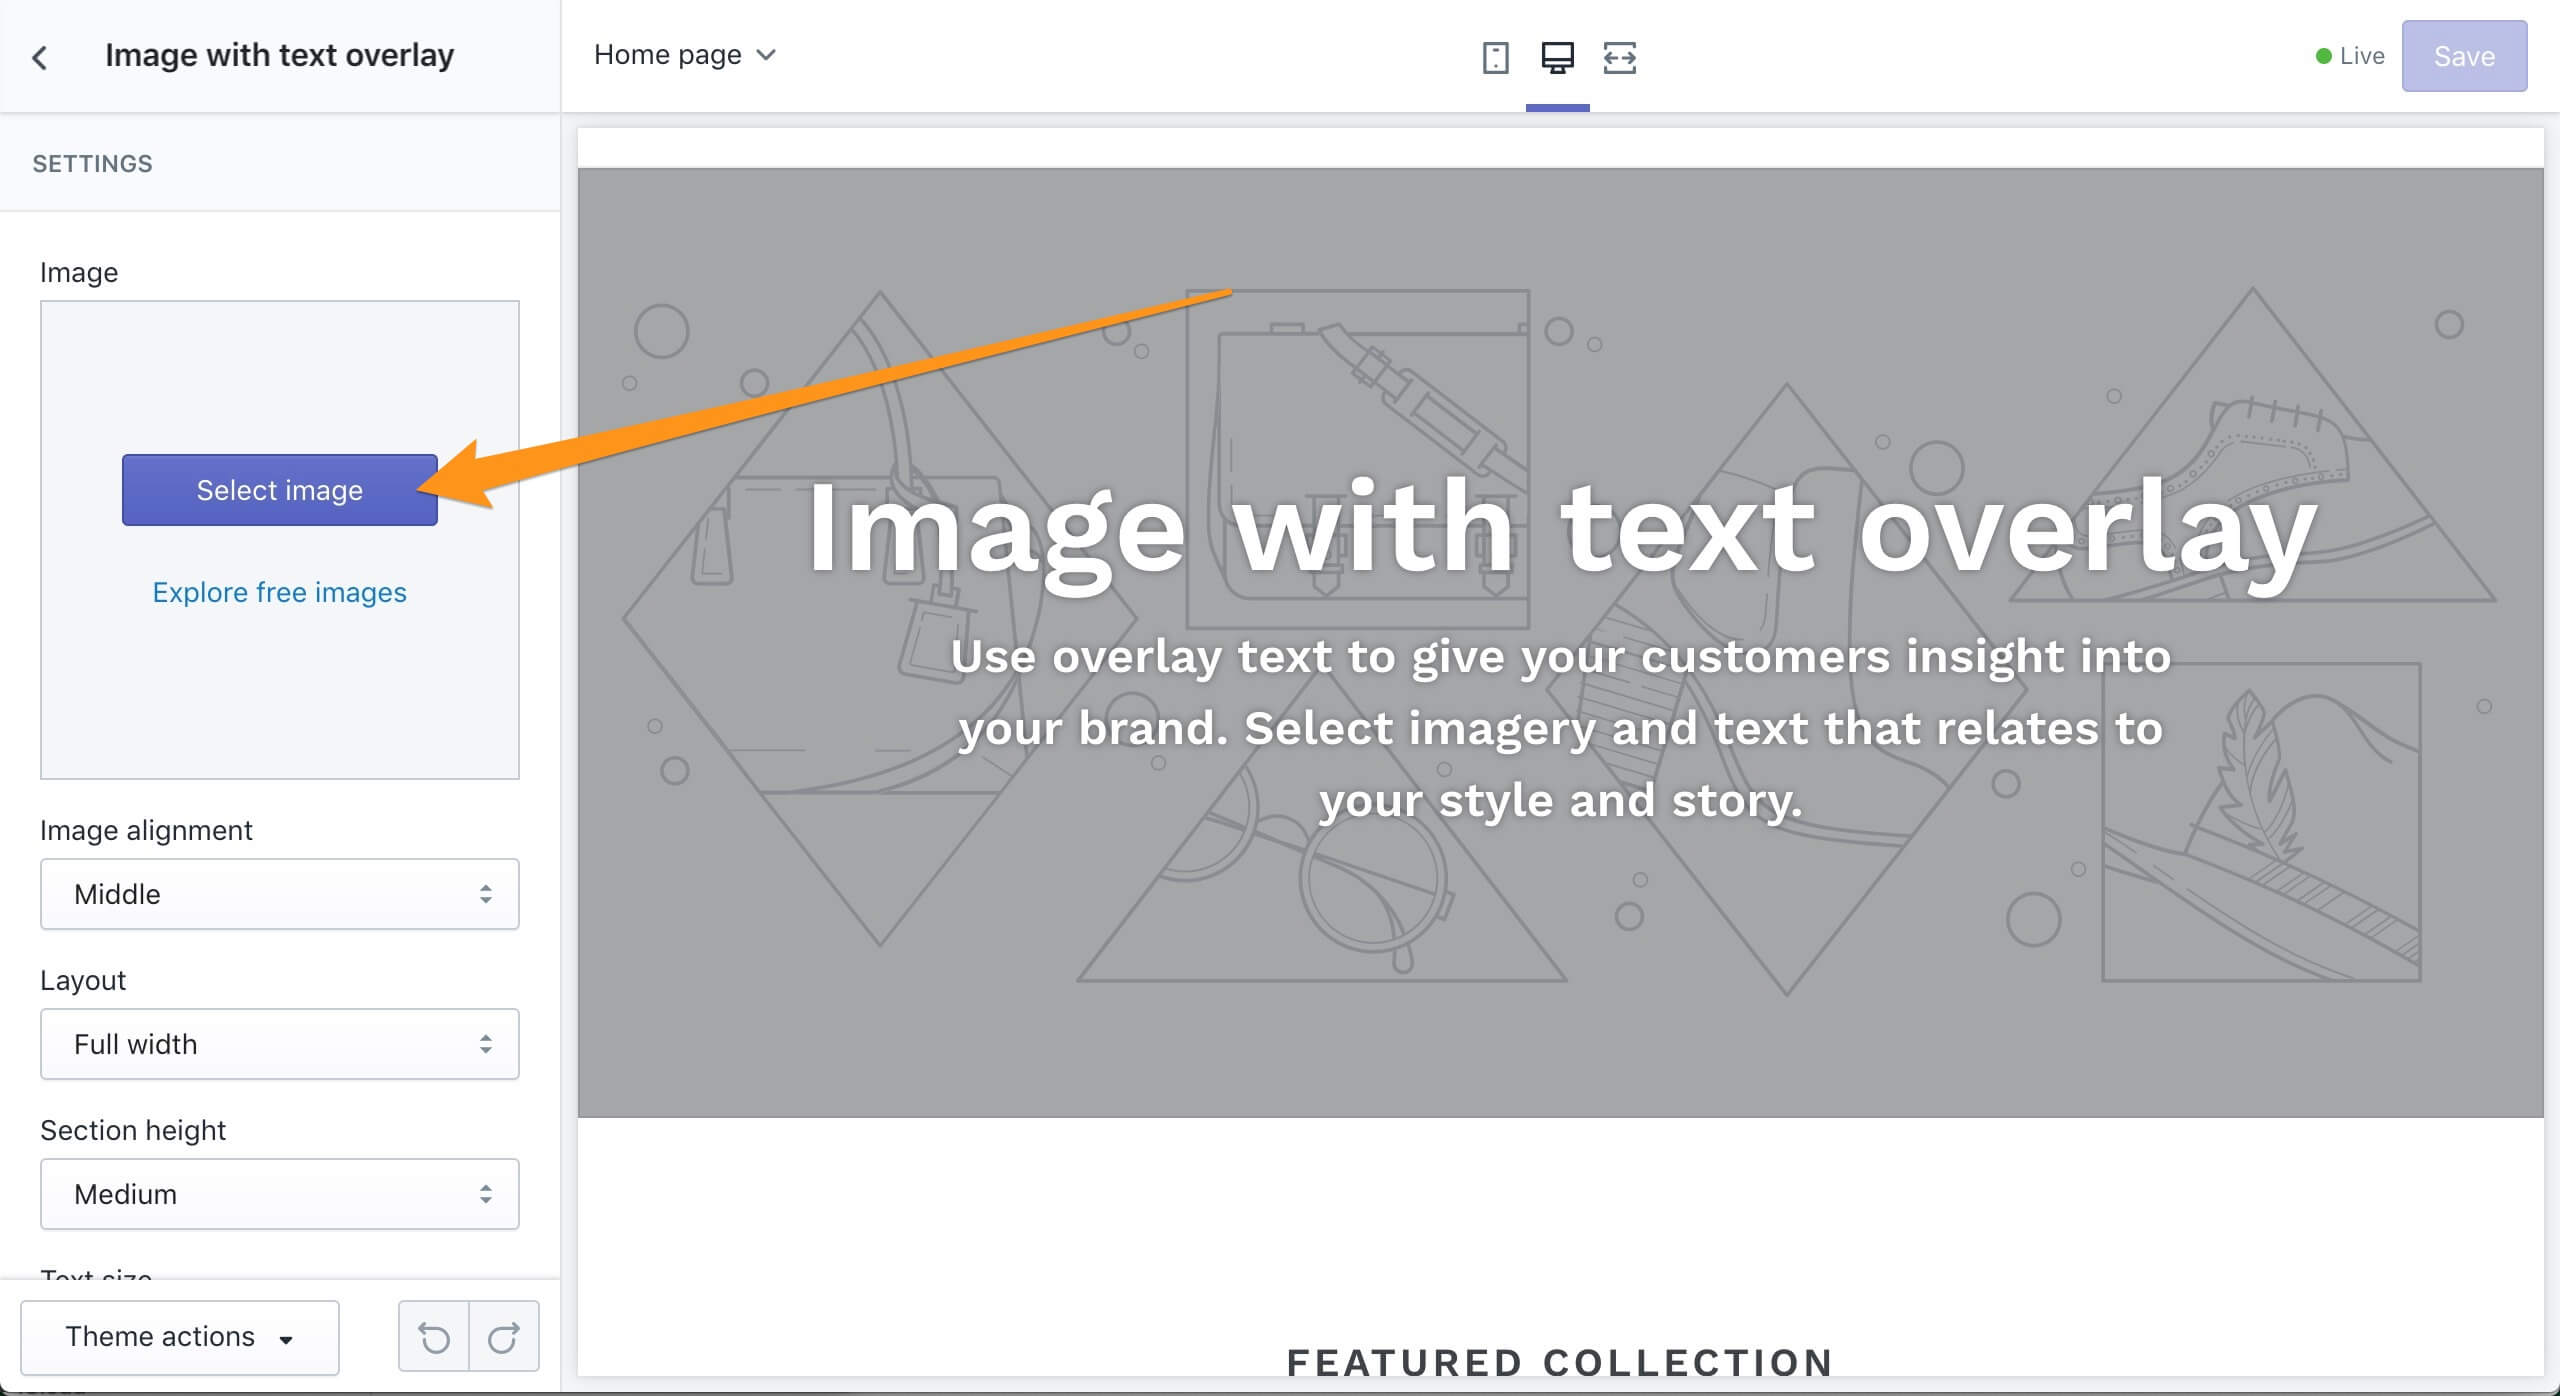
Then after clicking the section, you’ll get to the details. If you’re on the same default theme, click Select image button:
Now you can see the changes on your website by clicking Preview theme:

Here’s what it looks like in the Debut theme:
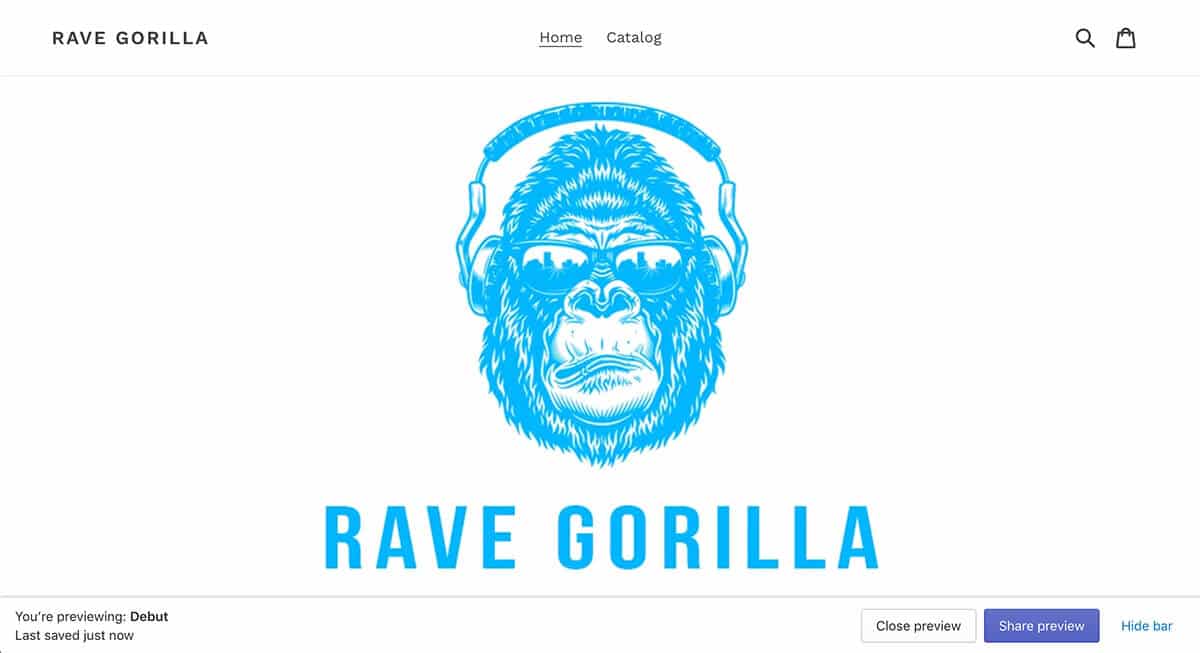
I just created a basic banner for this example (and removed the text overlay the theme has by default), but you can see how easy it is to grab an image and update your theme.
If you have a logo go ahead and add that now too. It’s usually in the Header section of theme settings, like this (after clicking Header from the main customize section:
![]()
Your logo will replace the default text placeholder (top left in this theme).
After you save your changes, refresh your theme preview (should be in another tab) to see the changes.
If you don’t have a logo yet, you might be interested in this post: Fun Way to Get Logos and New Designs. It shows the process we used for making the Speed Boostr logo – using a design contest.
From there, feel free to play with the customize theme section to bring your store to life – add images, text, add/delete sections and customize your layout.
It might feel overwhelming at first with all the options and a new interface. That’s ok just give it some time customizing and you’ll get to the point where it gets easier and you know right where everything is at.
Configure your store settings
You can adjust all of these settings later. Rather than bore you with the details on each, I’d just recommend going through each settings section to get a feel for it:
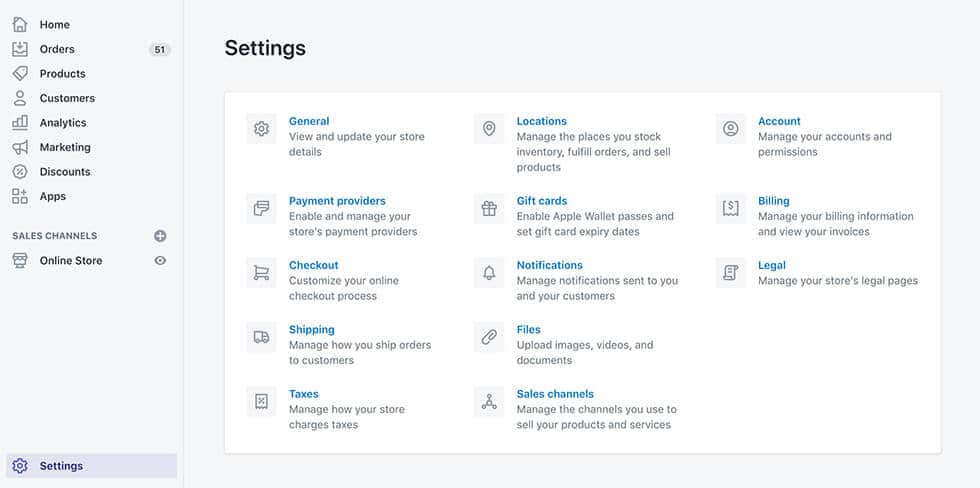
You might also click on each section in the Shopify admin, just to get a general idea where everything is at and the options you have for your store.
Going Live
When you have your product(s) and you’re ready to launch, complete your final admin tasks:
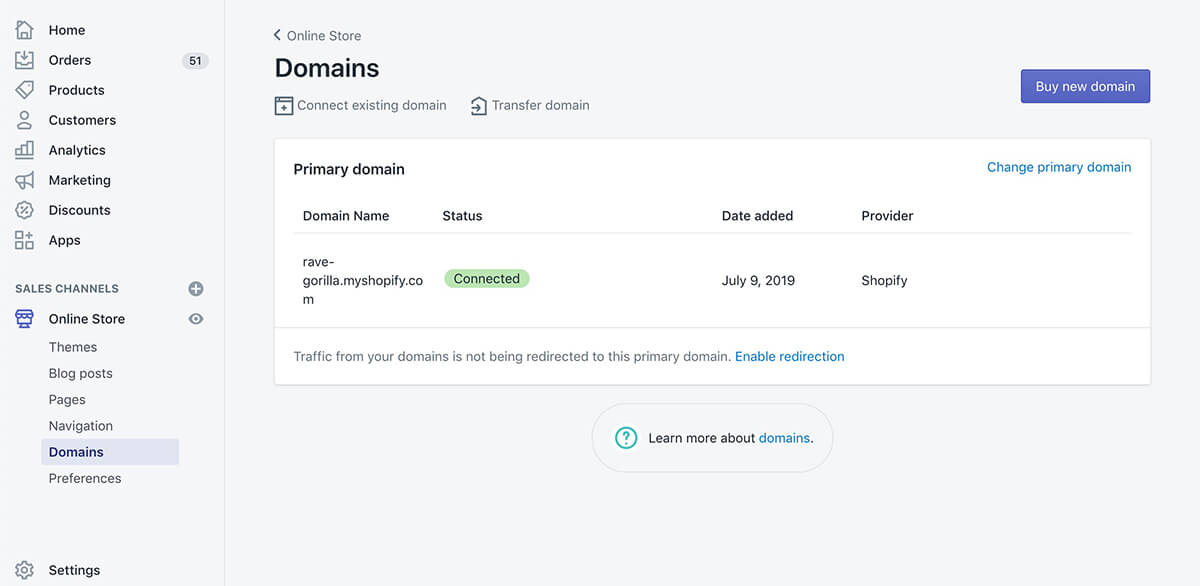
Configure your Domain
You can purchase your domain either through Shopify or another domain registrar. To purchase a new domain or connect an existing domain, go to Online Store > Domains in the Shopify admin.
Payment Settings
To activate payment gateways (accept payments) go to Settings > Payment providers. Activating Shopify Payments will allow you to accept credit cards. A lot of shoppers like to use PayPal so I’d definitely connect it.
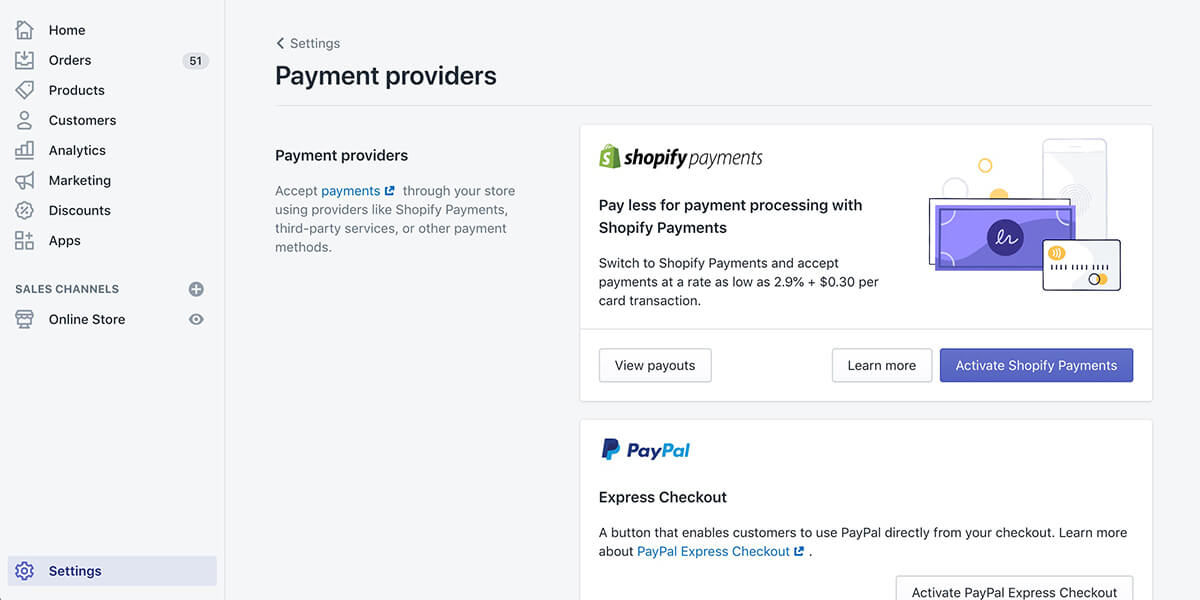
When you activate Shopify Payments, you’ll be able to connect your bank account to get paid 🤑
Activate Your Store
The Basic plan is all you need when just starting out (Here are the Shopify pricing plans).
You can upgrade later if you need to as your store scales up. The Professional Plan gives you gift cards and professional reports.
Just starting out, all you need is Google Analytics (free) for metrics. Then when your store is ready for gift cards and advanced reporting you can upgrade to Pro (gift cards usually don’t do much volume in sales in my experience, but some brands do well, depends on the brand / concept).
Once it’s live, do a test run by purchasing your own product. You can fulfill it too if you want to get the full experience, or you can just refund the payment and it won’t cost you anything.
Test the flow on both phone and computer… be the customer.
Create a Promotion plan
This is the hard part – getting noticed in a sea of online stores. It’s going to take some time and will be challenging.
The typical path is to experiment with various marketing channels until you find one that hits, then focus on that channel while you scale up.
Once you start building a social media following, getting ads dialed in, and getting organic search traffic, you’ll have created a revenue generating engine.
To get started, take a look at our list of the Best Shopify apps. You can get ideas for marketing, plus recommendations on Reviews apps, social proof apps, automation apps, and more. It’s a tough list to get on – we only put the apps we use and recommend.
You can also browse the Shopify app store to get ideas and experiment with more apps (there are thousands).
You can find an app for just about anything you can think of on a Shopify store. If you can’t find what you’re looking for let us know, we build apps and custom solutions too.
Creating your promotion plan now might help you shape the branding of your site, since you’re going to be thinking things like “who is my target audience”, “where does my audience hang out”, “what’s my USP (Unique Selling Proposition)”, “what do I want people to feel when they interact with my brand”.
Once you get your store going, take a look at our Shopify Conversion Rate Optimization Guide to maximize your chances of making sales for each visitor to your site.
What’s next?
Once you have your store up and running, take some time to create a good About page and work on creating brand messaging that connects with people that visit your site.
Think of your online store as a real life store – create a comfortable environment that you’d want to shop in.
You can find detailed information for all things Shopify in the Shopify Help Center.
If you have any questions, want advice, or need any help feel free to reach out. We enjoy working with Shopify entrepreneurs and helping your business succeed.
Good luck and enjoy the adventure!
Leave A Comment