Updated December 9th, 2020
Shopify Theme = the files and templating system that control the design of your site.
My goal with this post is to help non-programmers understand the system and show you how to edit your site’s design with code.
If the Customize theme section doesn’t have the option to change what your looking for, it’s time to dig into the code.
Step 1: Make a backup
Back it up before you hack it up.
Go to Shopify admin > Online Store > Themes > Actions > Duplicate.
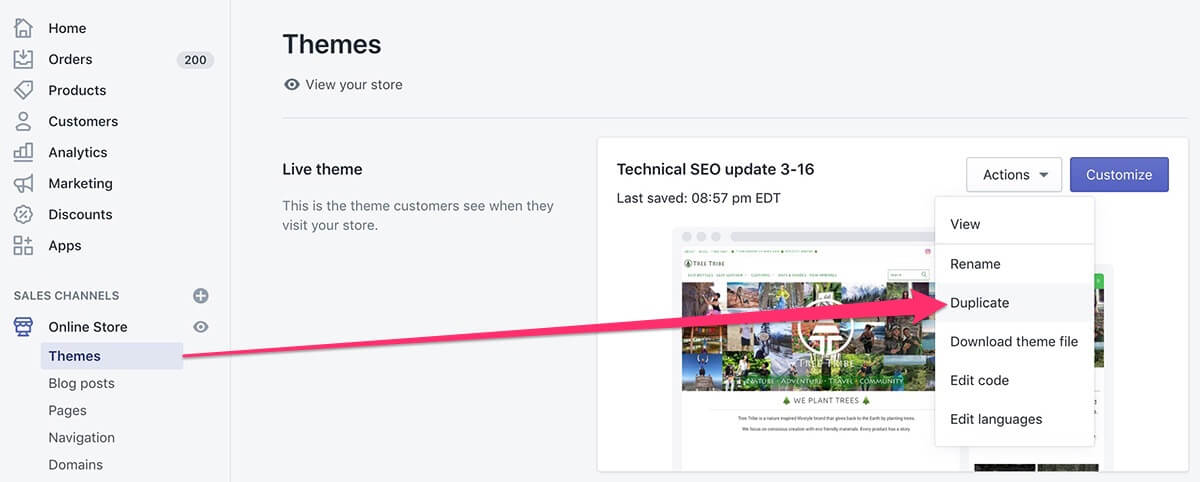
You’ll be working on this duplicate theme so that your live site is unaffected. If you screw up this duplicate theme, you can just delete it.
Always work on a backup theme, even for small edits. It safeguards against bugs plus lets you track theme changes better.
How to edit your Shopify theme code
Ok your duplicate is complete, so now let’s open up that new theme.
Go to Shopify admin > Online Store > Themes > Actions > Edit code.
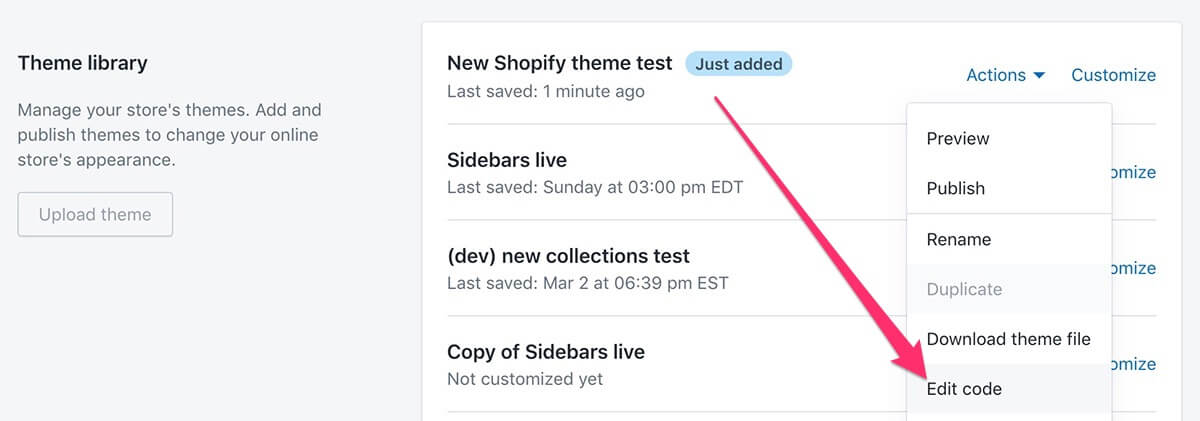
Now you’re inside the editor, this is where the magic happens.
For this tutorial we’re just going to work with 2 files, theme.liquid and custom.scss.liquid.
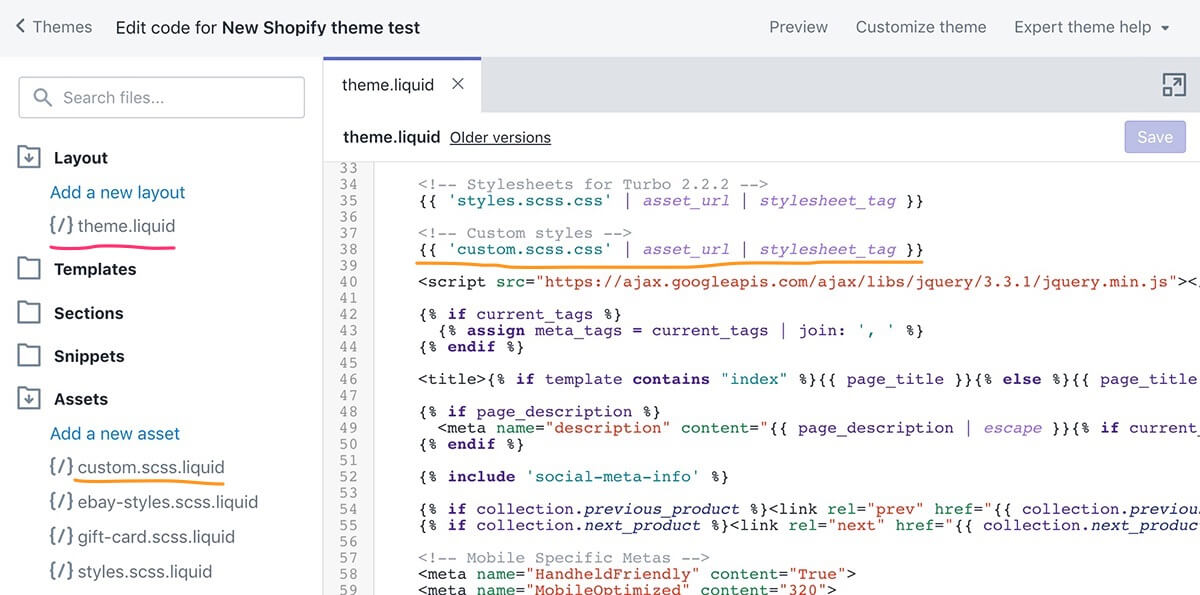
theme.liquid = the master template file that gets loaded with every page.
custom.scss.liquid = custom CSS file that overrides your theme styles.
Do you have a custom CSS file?
If not, click Add a new asset then create a blank file called custom.scss.liquid.
Then add it to theme.liquid in the head section after the styles.scss.css file (or whatever your default theme stylesheet is called) like the screenshot above:
{{ 'custom.scss.css' | asset_url | stylesheet_tag }}
The order is important. By placing it under your standard theme stylesheet, your custom style sheet will override the rules of the regular theme styles.
By using .scss.liquid instead of .css, your CSS code will auto-minify on the server, making your file lighter.
The speed savings won’t make a difference with a small custom CSS file, but I’ve written thousands of lines of custom CSS on some client’s sites, that makes a significant difference when you minify.
SCSS stands for Sassy CSS. It’s a format that gives you additional tools like nested rules and variables. It’s awesome but not important for this tutorial… just mentionign in case you’re wondering about the syntax.
Ok you learned something new, now let’s get back to action ✊
Open your custom stylesheet. Now you can add CSS code to it like this:
Code comments
It’s good to add code comments to let other people know what the code block does.
It also makes your code easier for you to read and reference in the future.
The gray faded text in the above screenshots are comments.
Why not just add CSS to the end of your theme’s stylesheet?
You can do this if you want, but then if you update your theme later all of your custom edits could be wiped out. Having all your custom styles in a separate file is safer and easier to edit / organize.
How to know what CSS code to change?
Ok you know how to edit custom CSS, but how to tell what code to put in the CSS file?
A: Use Chrome Dev Tools and inspect the element on your website.
Most browsers have some form of dev tools, Chrome is just the one I prefer.
To open the element inspector in Chrome press CMD + Shift + C on Mac or Control + Shift + C on Windows.
You’ll get a highlighter and console will open up:
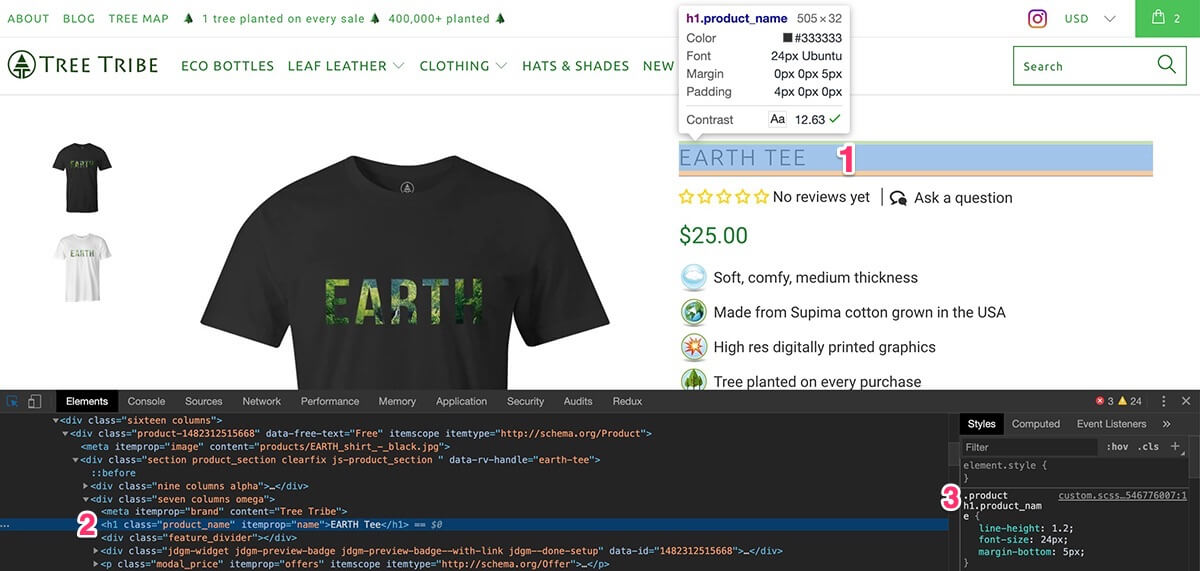
1 = the element you want to inspect (click on it).
2 = the html code of that element.
3 = the CSS rule(s) that apply to that code.
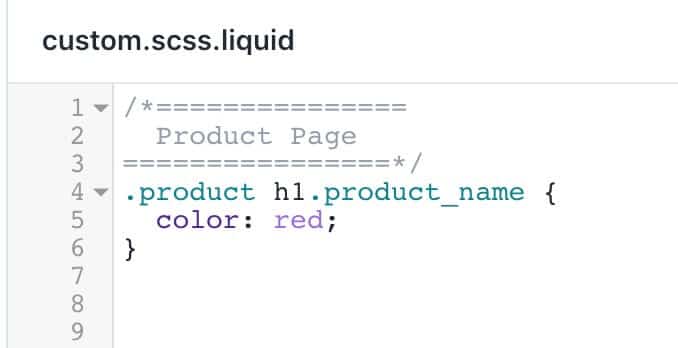
Let’s say I wanted to change the product title to the color red. I can edit the CSS directly like this:
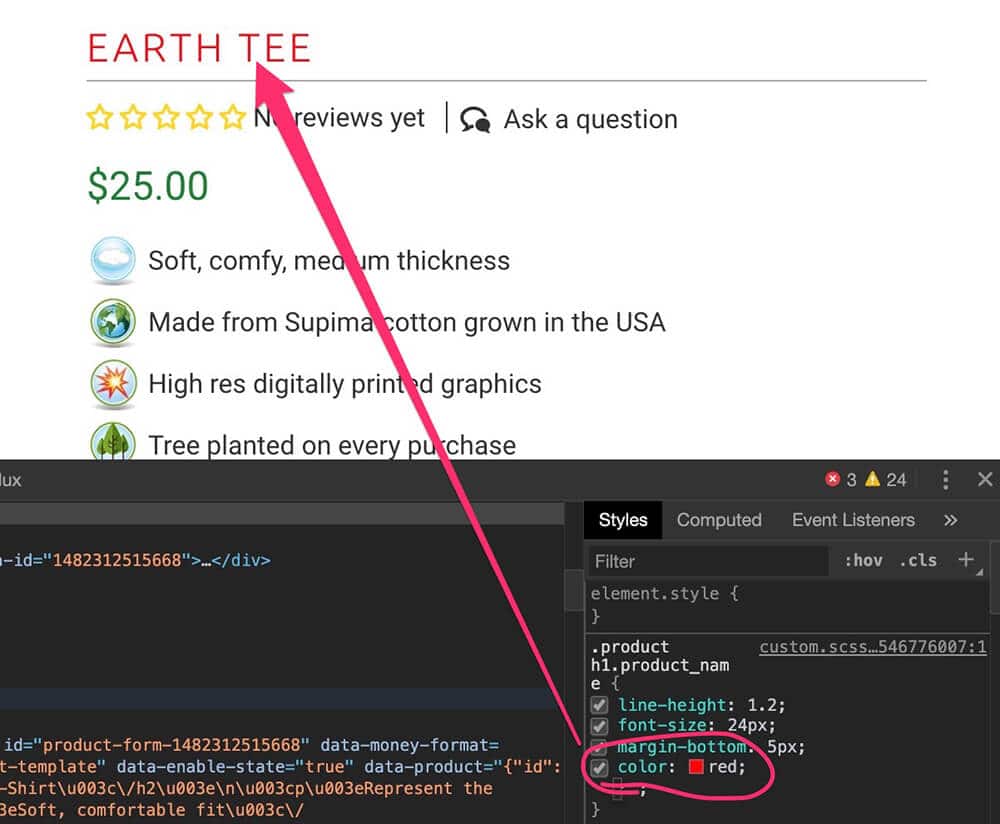
Edit in your browser first, then when you have the CSS code ready, throw it in your custom CSS file like this:
Notice I only needed to add the single customizaton I made. The other CSS rules are still loading, I’m just adding this extra one.
Now if you save that file and publish this theme, the product title will be red.
If you’re not familiar with CSS and would like to learn, here are 2 high rated Udemy courses: CSS – The Complete Guide and Build Responsive Websites with HTML5 and CSS3.
Finishing up
After you’ve made your edits, save your theme files and click Preview to see what this theme would look like if it was published.
If you like what you see click the Themes link in the header of the editor page to go back to your Themes page. Then click the Actions button next to this theme and select Publish. Now your new theme is live 🤘
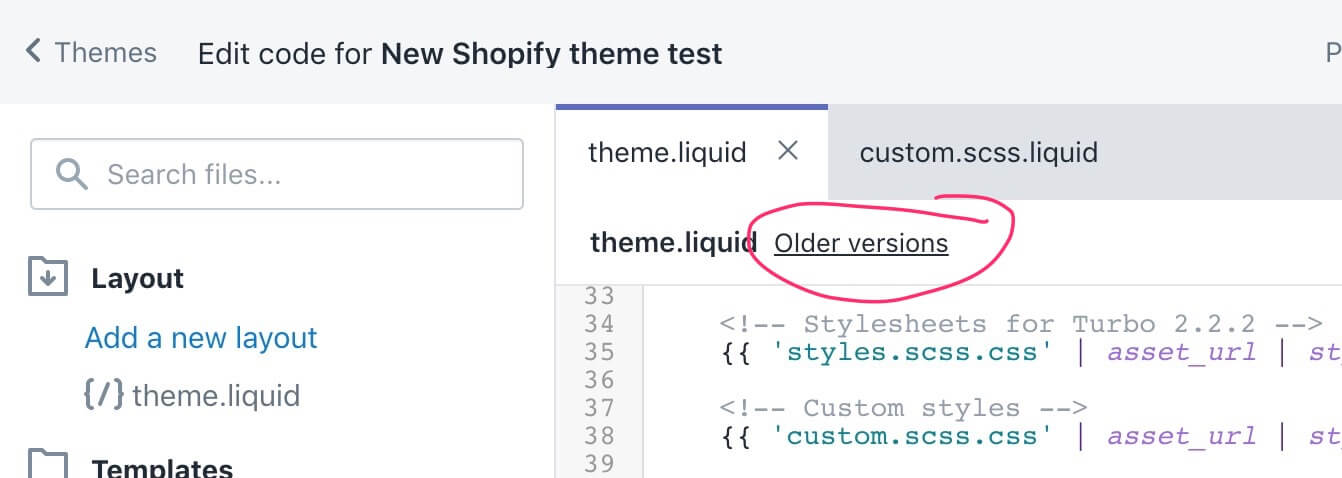
If you accidentally updated your live theme and made a mistake you have a options to fix it:
A) Some files will have an Older versions link that you can click to revert back to previous versions of the file.
B) If you periodically download your theme file for backup, you can re-upload that backup theme to restore the whole theme.
C) You can use a back up app like Rewind to automatically backup your theme, pages, blog posts, etc.
I use Rewind for peace of mind but if you’re just starting out I think manual backups are fine.
Final notes
⚠️ Always duplicate your theme so your work doesn’t affect your live site until its ready.
👨💻 Make edits in the browser first to quickly see what the changes would look like.
Have fun 🕺💃